Belt Drive Tension Adjustment
About
This procedure provides instruction to verify and make adjustments to the belt drive tension. The belt tension should be verified anytime the belt is replaced, at regularly scheduled preventative maintenance, or when there are any unusual belt related issues (noises, pedal slip, etc.) while operating the bike.
Belt adjustment requires removing the front and rear belt guards and the use of a belt tension gauge.
|
CAUTION: Improper belt adjustment will cause premature wear and may void the Precor Limited Warranty. |
Specifications
| System Component | Specification |
|---|---|
| Belt Drive Tension | 140 - 150 lbs |
Available Movies
|
|
Belt Tension Adjustment |
Procedure
Review entire procedure before starting.
- Remove front and rear belt guards, see Belt/Chain Guard Cover Replacement.
- Remove all brake pad flywheel resistance by turning the resistance knob counterclockwise (-).
- Place the Belt Tension Gage
 onto the belt
  .
.
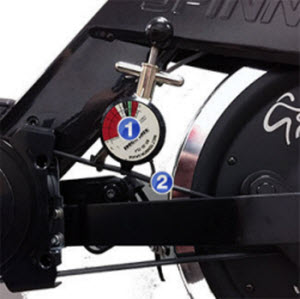
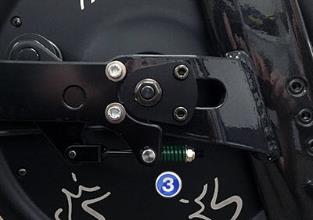
- Adjust the belt tension between 140 - 150 lbs tension using the 13 mm belt tensioner adjustment nut
 . Replace the belt if it cannot be adjusted within the specified limits.
- Slowly turn the crank and verify the belt is operating smoothly and with no other issues (noises, binding, etc.).
- Mount and pedal bike to verify that there are no issues with the belt adjustment.
- Replace belt guard covers in reverse order, see Belt/Chain Guard Cover Replacement.
- Verify bike operation per Operation Verification Checklist and return to service.
See Also